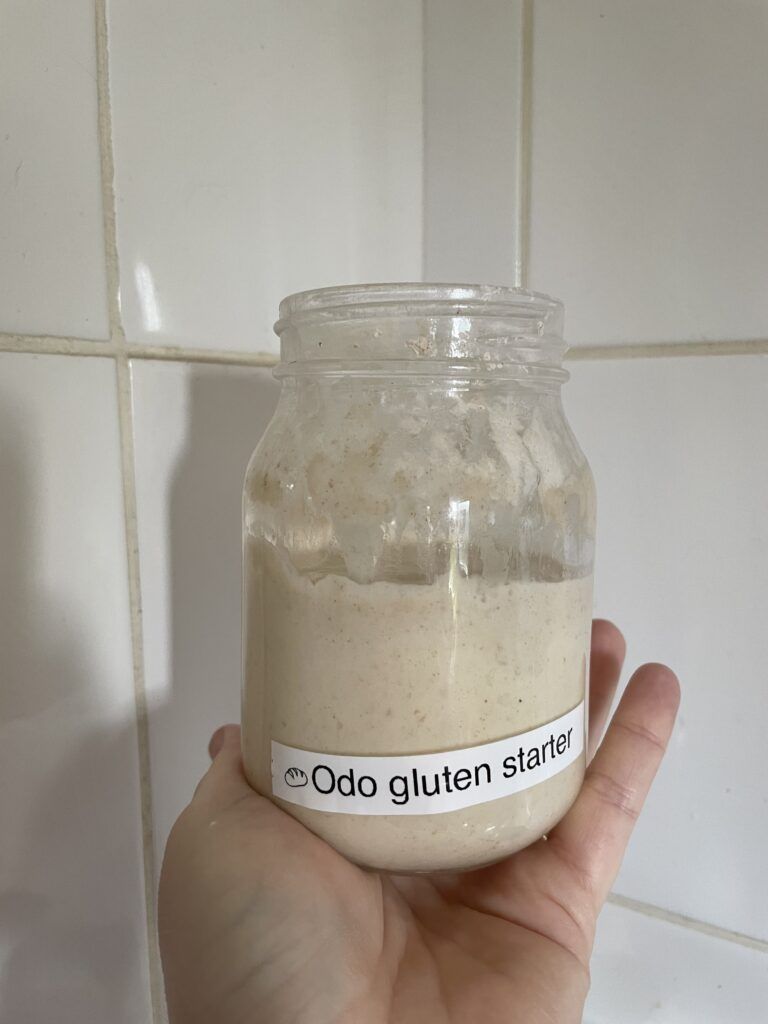
This is ODO, my basic sourdough starter. It’s almost two years old and the basis for all the sourdough bread I make at home. If you are a fan of Star Trek you will get why I call it that.
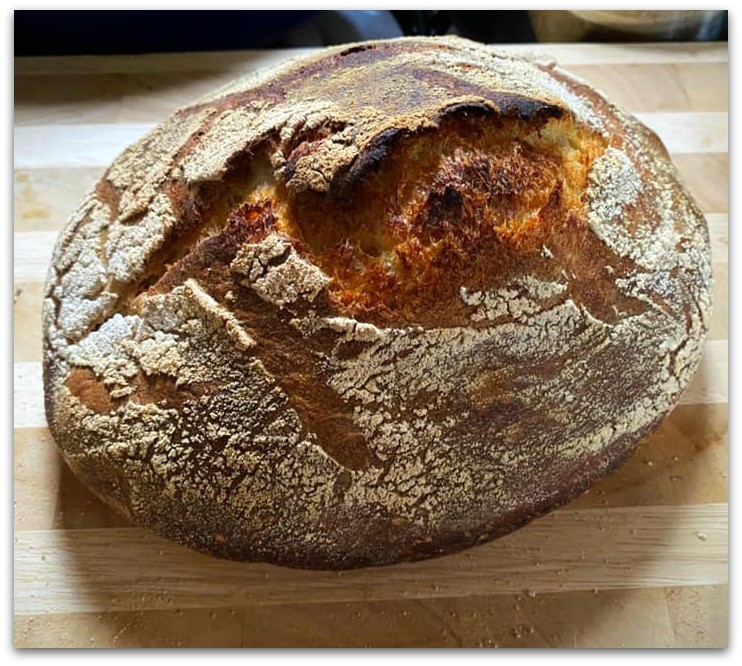
I am a big fan of making sourdough bread, and make about 2-3 loaves a week because it’s cheaper than shop-bought bread, and gets eaten fast, and my kids love it. I am always keen to make food from scratch when I can, and bread doesn’t need to contain loads of “stuff” that is added to commercial bread.
Sourdough bread is naturally leavened bread, which means it doesn’t use commercial yeast to rise. Instead, it uses a ‘starter’ – a fermented flour and water mixture that contains wild yeast and good bacteria – to rise. This also produces the tangy flavour and slightly chewy texture you’ll find in sourdough. Wild yeast has more flavour than commercial yeast and is natural in the sense that it doesn’t contain any additives.
The starter for sourdough is your friend and is what makes the bread. You can make your own, which I prefer to do, or buy one made for you, that you can use. I find making your own works better because each starter tends to be better if they are developed from the start in the environment they are going to live in, with the atmosphere, temperature, and air contents they adapt and grow with.
It isn’t hard but can be a little fiddly at first and you may try some starters and fail and need to start again. Fortunately all you need is flour and water and a container so it’s not expensive if you don’t get it right first time.
This is the basic sourdough starter recipe I follow. I use plain, organic white flour, with no additives, and tap water. Some recipes will call for fancy flours and mixes of flours and distilled or purified water but I don’t bother with that. Bread should be simple and easy, and so should your starter.
I use two old jam jars, one for the starter to live in, then once every month I move it to a new jar and clean the other one. Some people don’t do this, but I find it stops build up and mould, especially in warmer months. My starter seems to like this and thrives. Sourdough needs air to live, so you either need a container with a very loose lid, to allow airflow, or use a cloth and rubber band to cover your jar. I cut up an old facecloth and use a band to hold it on. This allows the starter to breathe but keeps it clean and uncontaminated. I also dampen my cover every time I use my dough and feed it.
You will need:
A container. (jam jar, mason jar, anthing will do. Make sure you have sterilised it by boiling it in hot water, or washing it on a hot dishwasher cycle, this makes it clean so the starter has a clean base to grow)
A cover (see above)
Plain flour
Water
And time. It takes a few days.
Day 1:To begin your starter, mix 50g flour with 50g tepid water in a jar or, better still, a plastic container. Make sure all the flour is incorporated and leave, covered but so it can breathe at room temperature for 24 hrs.
Day 2:Mix 50g flour with 50g tepid water and stir into yesterday’s mixture. Make sure all the flour is incorporated and leave, covered but so it can breathe room temperature for another 24 hrs.
Day 3:Mix 50g flour with 50g tepid water and stir into yesterday’s mixture. Make sure all the flour is incorporated and leave, covered but so it can breathe at room temperature for another 24 hrs.
Day 4:You should start to see some activity in the mixture now; there should be some bubbles forming and bubbling on top. Mix 50g flour with 50g tepid water and stir into yesterday’s mixture. Make sure all the flour is incorporated and leave, covered but so it can breathe at room temperature for another 24 hrs.
Day 5:The mixture should be very active now and ready for making your levain (starter). If it’s not bubbling, continue to feed it on a daily basis until it does. When it’s ready, it should smell like yogurt. It should not smell unpleasant, and if it has mould or lots of scum on it, you may have to start again and look at if your room is too warm or there are contaminants affecting your starter (see end of post)
Once you have your starter ready to go, you can merrily start making bread and other things with it. I use it for bread, scones, pancakes and also savoury muffins.
Storing and feeding.
Sourdough stater is a bit like a pet and does need some TLC and care. You need to feed it regularly and make sure it’s in a spot in your kitchen where it can thrive. It needs to be away from things that can affect it or contaminate it. So not near strong smells, or pollen. Also, keep it away from where fruit is, I find my sourdough starter doesn’t like being too near our fruit bowl, for some reason. Temperature is key, too cold and it will hibernate, and too hot and it will either overgrow and go mouldy or die.
I feed mine when I use it and as my recipe calls for 50g of sour dough, I simply replace that with 25g of flour and water each time. If you are not using your starter you should discard a small amount and feed it regularly, using the same flour each time if possible. I take out four teaspoons of startert and put back two of flour and water, when I am not using it for baking or coooking.
Basic tips and troubleshooting
If you don’t need your starter but don’t want it to die, or throw it away, you can store it in the fridge. I do this when we go away or when the weather is too hot. Simply make sure it’s covered with a breahtable lid and keep it in the colder part of the fridge but not close to strong smells like garlic and away from herbs. To reactivate it, I take mine out of the fridge and allow it to come back to room temperature for 24 hours, then feed it and use it 24 hours later.
If your sourdough starter goes mouldy or has a weird scum on it, you can rescue it, sometimes. You can lift off the yucky bit, and it may just be one layer, and the starter underneath is ok, and needs to be fed and will come back to good. If not, you will have to start again. If it doesn’t smell right don’t use it. I find changing containers once a month prevents this. I simply make sure my spare jar is clean, pour the starter into it, and cover.
So that’s it. A little work but worth it, if you want to start making sourdough bread at home.